
2026-07-02
Leveling Sunken Paver Driveway Sections Without Removing the Entire Field
Targeted lift-and-reset techniques that restore grade without the cost of a full paver re-lay.
Read Guide → Advertisement
Step-by-step restoration of sunken paver driveways, weed elimination, and satin-finish paver sealers.
Over time, paver joints lose their joint sand, allowing weeds to sprout and pavers to shift. The sand between interlocking pavers is not just filler—it is the structural element that locks the pavers in place, distributes loads, and prevents lateral movement. When that sand washes out from rain, foot traffic, and pressure washing, the pavers lose their interlock, edges chip against each other, and the surface becomes uneven. Restoring the joints with polymeric sand and a protective sealer reverses this decline and returns stability to the driveway.
The restoration process begins with a thorough cleaning. The driveway is swept and then pressure-washed at a moderate pressure—enough to remove dirt, moss, and old joint sand without damaging the paver surface or eroding the bedding layer beneath. A cleaning solution may be applied to kill organic growth and lift oil stains. It is essential to remove all existing joint material down to a consistent depth, typically three-quarters of an inch to an inch and a half, so the new polymeric sand can fill the joints completely and lock properly.
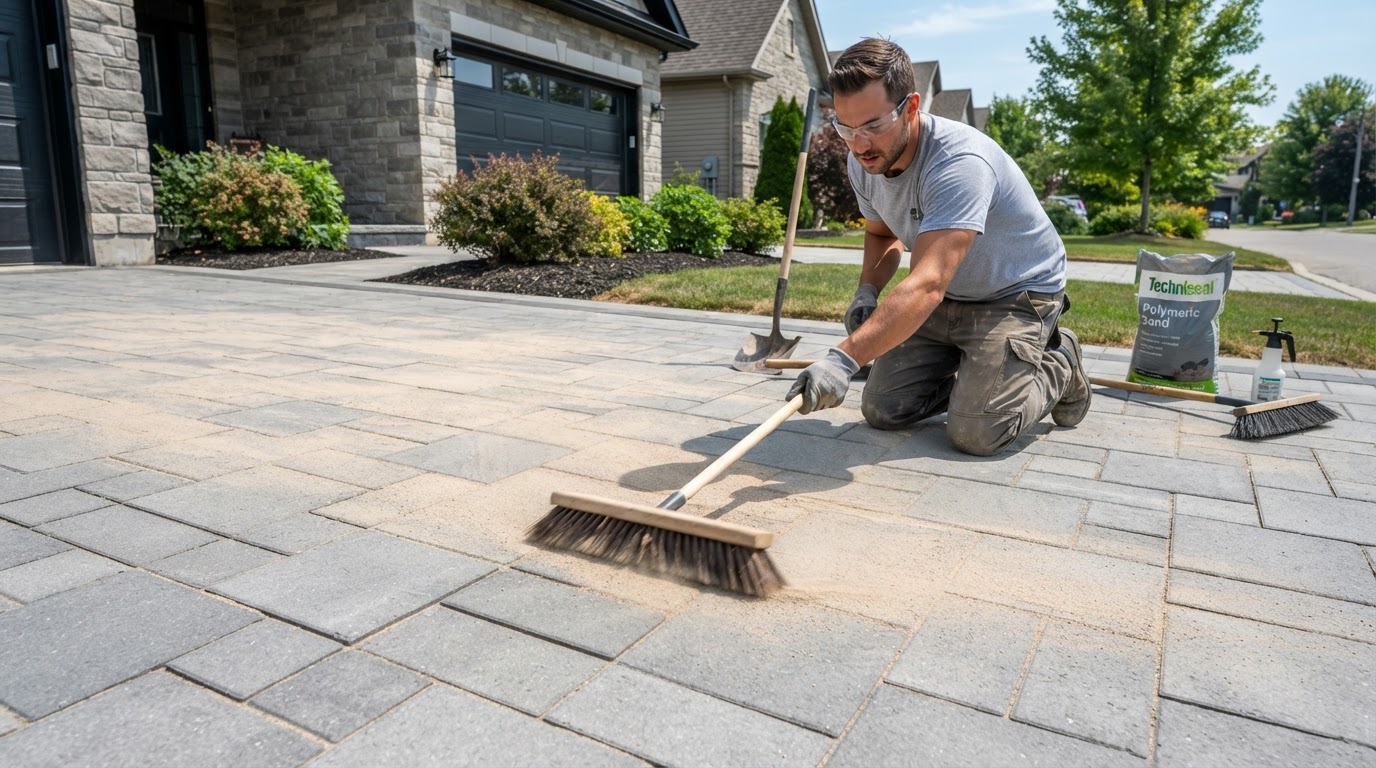
After cleaning, the surface must dry completely—usually 24 to 48 hours of dry weather—before the polymeric sand is applied. Polymeric sand is a blend of fine graded sand and a water-activated polymer binder. It is swept into the joints with a stiff broom, worked in from multiple directions to ensure the joints are packed full, and the excess is swept off the paver surface. A plate compactor with a rubber mat is then run over the pavers to vibrate the sand deep into the joints, and more sand is added and re-compacted until the joints are densely filled.
Activation is the critical step that separates polymeric sand from ordinary joint sand. Once the joints are full and the surface is clean of all residual sand, the driveway is gently misted with water. The water activates the polymer binder, which cures over the next 24 to 48 hours to form a flexible, water-resistant glue that holds the sand in the joints. The misting must be done carefully—too little water leaves the binder unactivated deep in the joint, and too much water can wash the polymer out before it sets. Most products require three light misting passes a few minutes apart.
Weed elimination is one of the primary benefits of polymeric sand. Because the cured sand forms a hard, bonded surface in the joint, there is no loose material for weed seeds to germinate in, and ants cannot easily excavate the joints as they can with plain sand. This dramatically reduces the maintenance burden of a paver driveway. However, polymeric sand is not a permanent weed-proof guarantee—if organic debris accumulates on top of the joints, seeds can still sprout in that debris, so periodic sweeping is still recommended.
Sealing the pavers after joint restoration adds another layer of protection and enhances the appearance. A paver sealer—typically a solvent-based acrylic or water-based urethane—penetrates the paver surface and the joint sand, binding them together and creating a barrier against water, oil, and UV fading. Sealers come in a range of finishes from matte to high gloss; a satin finish is the most popular for driveways because it enhances color without the slippery sheen of a gloss finish. The sealer also helps lock the polymeric sand in place, further resisting washout from heavy rain.
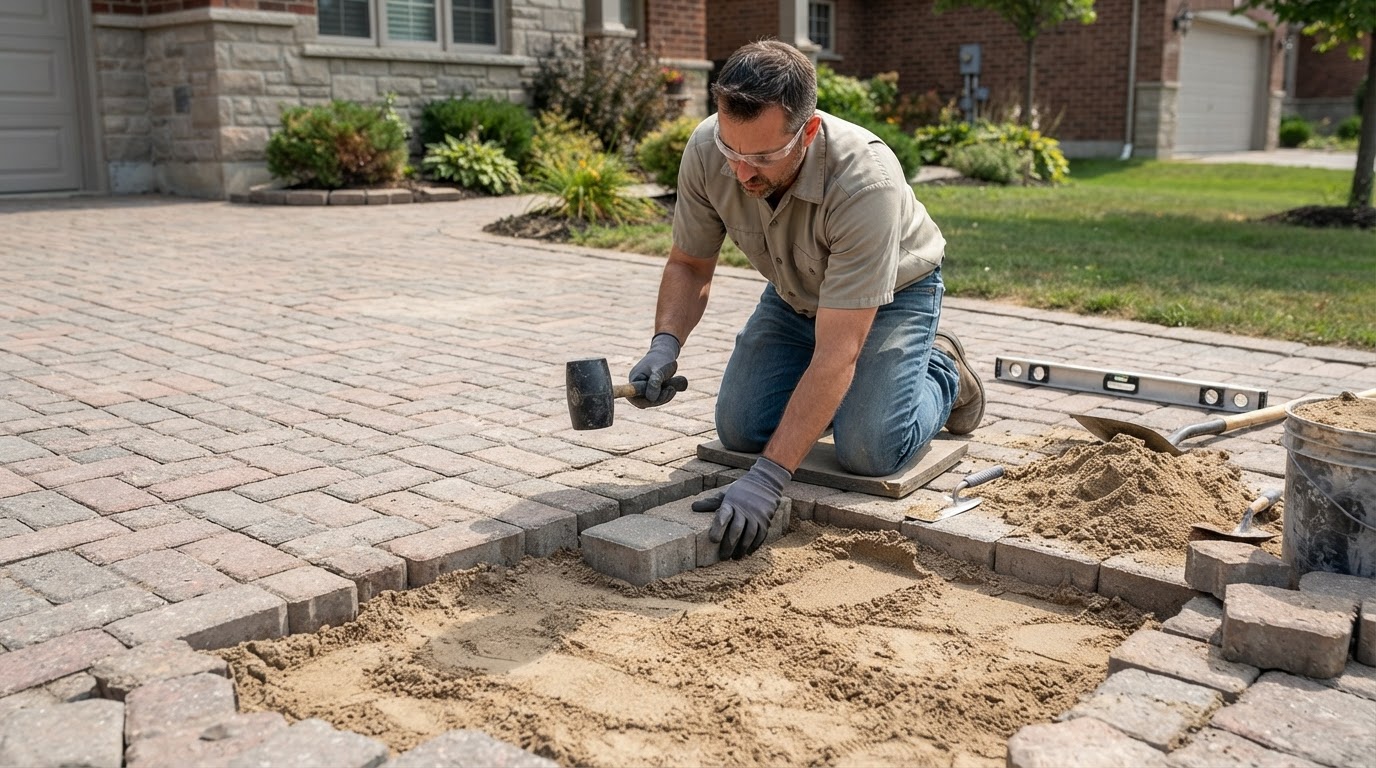
Sunken paver sections require a different approach. If a section of the driveway has settled, it usually indicates base failure or water undermining the bedding sand. Rather than relaying the entire driveway, a contractor can lift only the affected pavers, recompact or replace the base material, re-level the bedding sand, and reset the pavers at the correct elevation. This targeted repair is far less expensive than a full re-lay and, when done correctly, is indistinguishable from the surrounding surface.
With proper restoration—cleaning, polymeric sand re-pointing, sealing, and targeted leveling—a paver driveway can look and perform like new for a fraction of the replacement cost. The key is using the right materials, allowing proper drying and curing time, and not rushing the activation step. A well-maintained paver driveway, resealed every three to five years, can last decades and remain one of the most attractive and durable driveway surfaces available.
Looking for a qualified contractor? Browse our directory of driveway resurfacing professionals specializing in paver resurfacing & restoration. Compare services, request quotes, and find the right specialist for your project.
AdvertisementTargeted lift-and-reset techniques that restore grade without the cost of a full paver re-lay.
Read Guide →Interlocking paver cleaning, polymeric sand re-pointing, and sealing.
Browse Paver Resurfacing & Restoration